Protected: CMS Manual: Events
CMS Manual: Events
Events
The “Events” tab within the dashboard is used to create and manage Event posts.

You can search the existing library of Event posts by selecting “Events.” Search for a post using the search bar in the upper right. Scroll through the list more easily by sorting by category (Published, Drafts). Filter by “date” or “category” using the pull-down filters.

Editing an Event Post
Find your Event Post in the list of posts. Hover over the title and then click “edit”. You can also delete, clone, and Rewrite/Republish a post from this hover menu.

-or-
Go to the Event you want to edit on the website and click “Edit Event” in the top menu of options. This will only be present if you are logged into WordPress

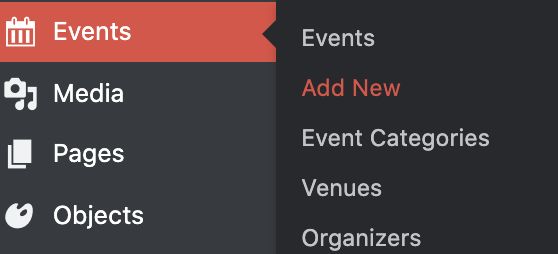
Creating an Event
In the dashboard, hover over “Events” and click “Add New.”
-or-
When in the list of “All Events” click “Add New” at the top left of the page above the sorting categories

Building an Event
Once on the editing form, begin by adding a Title. The “Title” appears at the top of the page, and in search results. The first time you update the editing form, a title will be used to create a permalink. You can edit this link, for example, to remove words like “the”.

Creating an Event Header
Page Header Image
You may want to add a “Page Header Image.” If you do not add one, then the page will default to not using one.
Event Cost Text
If event fees require additional text, enter it here. Ex: “Free for Murdock Society Members”. If a monomial cost is entered below, it will display before the content of this field (“$8, Free for Murdock Society Members”)
Hide End Time / all Times
By default, these will both appear. Click either option to have them not display on the front-end

Adding information to the Events Calendar
Time & Date
Select a date and time for your event. Clicking the fields will open a date picker calendar and a time dropdown.
If it is an “All Day” event, click that checkbox.
If the Event is part of a series, click “Add More Events” and choose the appropriate option for when the Event will repeat.
If the Event is part of a series, but has dates that need to be excluded, click “Add Exclusion” and choose from the appropriate options.
If the Event is recurring, give it a Recurrance Description, like “weekly”

Location
Choose the location of the Event from the “Location” dropdown menu. If the location does not already exist, create a new one.
Determine if you want a map and map link to appear. By default, they will.

Organizer
Choose the party organizing this event from the “Organizer” dropdown, or click “Add Another Organizer” to create a new option

Website
If the event has a website associated with it, add the URL here. That can be either a WAM link or an external link.

Event Cost
Add the currency symbol and Event Costs for the Event

Event Fields
By default, all events will automatically have “About this event” This appears in the left column on the front-end. This can be changed.
If you add an “About the Event Image” this will appear in the left column on the front-end under About this Event”
Then add your body copy for “About this Event” in the WYSIWYG editor. This appears on the front-end in the right column.

Adding Additional Event Content
An “Event” post can be built much like a page. It has several flexible blocks for you to choose from by clicking “Add Block.” Those include:
- Content Block
- Collections Grid
- Content Grid
- Color Block Quote
- Featured Color Callout
- Image Callout Grid
- Card Callout
- Image Slider
- Downloadable Content
